
What do you think you would do with an the additional 39,000 dollars in your savings account each month?
If you are planning to build an e-commerce site You can anticipate to get this massive amount of income If you are doing it correctly.
Of obviously, sellers on e-commerce who aren’t able to earn this much money, however using the correct ecommerce strategy and the best methods, it could become the reality of your business.
However, before you start making money, you must start by establishing and owning an online store.
Watch as I provide you step-by-step how to build an eCommerce website using WordPress.
Your Two-Minute Cheat Sheet
Do you want to learn what it takes to design an eCommerce site in one sentence? Here’s a brief overview. I’ll provide more details on each step If you require more assistance.
In the beginning, you’ll need pick a domain as well as a web hosting service which will give you the chosen domain name at no cost.
Because your hosting service decides on the WordPress store’s speed of loading along with uptime, speed, and additional features, I strongly recommend choosing Bluehost.
It is without doubt one of the most reliable web hosting companies that isn’t only affordable but also provide a lot of bonuses, including a free domain name. Pick the basic plan, and then register your domain before completing the deal.
When you’ve completed setting the Bluehost account, you can install WordPress. One reason I suggest Bluehost is the fact that it has the ability to set up WordPress for you. All you have to do is hit some buttons and you’ll get your WordPress website up and functioning.
You’ll be running a basic WordPress site. To convert it to an online shop then you’ll need to set up an eCommerce plugin.
It’s my choice, however it is possible to choose other alternatives that meet your requirements more. It is time to create the store that includes making page for your store creating a localization and figuring out sales tax as well as choosing a payment method.
When your store is up and running and you’re ready to add your items or services. In the end, it won’t be an online shop without having something for sale, wouldn’t it?
The only thing left to do is choose the best theme to create your WordPress online store, and then install the additional plugins needed to expand the capabilities of your store. The choice is contingent on your preferences and needs and you’re free to choose what you want.
Personally, I like ThemeForest for theme selections. You can also look through WordPress’s plugin directory to download extensions, such as Yoast SEO, Jetpack, and Contact Form 7. I’m sure it will be a great help in boosting the performance of your online store!
Don’t waste money, and discover the potential hidden in your marketing.
- Explore the potential of in-built marketing.
- Reach your ideal target audience.
- Optimize the efficiency of advertising.
This is all you need to know about the cheat sheet. We’ll now get to the ins and outs of creating an online store using WordPress.
Step 1: Get a Domain Name and Web Hosting Provider
If you decide to launch an online shop or other type of website that you want to start, you will require the domain name and web hosting services.
Your domain name represents the store’s address unique online. In my case, for example, my site’s address is nexship.ca

Web hosting On the other hand it is a type of remote computer which stores your website, and later provides it to users when they go to it.
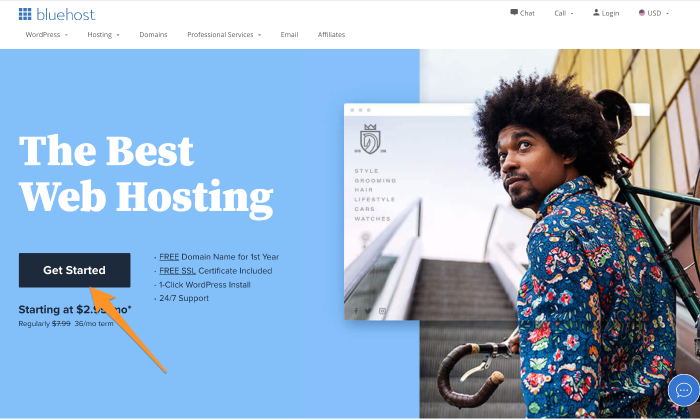
There are many excellent WordPress hosting companies, however my preferred option is Bluehost due to its reliability and has fast loading speeds and comes with a no-cost domain name as part of its affordable plan for subscriptions.
Here’s what you need to do:
Choose Your Bluehost Subscription Plan
Head over to Bluehost, and click on the huge Get Started button.
From there, you’ll be directed to a page that shows you four hosting plan options:
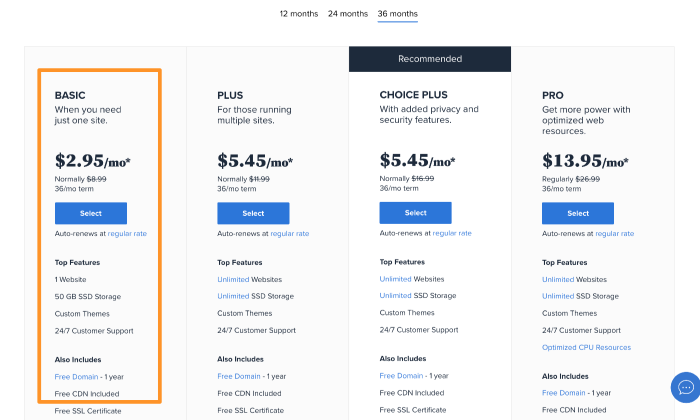
As this is the first time having an online shop I suggest you go with the basic plan which costs only $2.75 per month, and comes with an unlimited domain (for the duration of one year).
Pick Your Domain Name
The next step is choose a domain from the new store.
Select create the new domain then type in the domain name you want to use. After that, Bluehost will automatically display the available domain extensions or equivalent domain extensions.
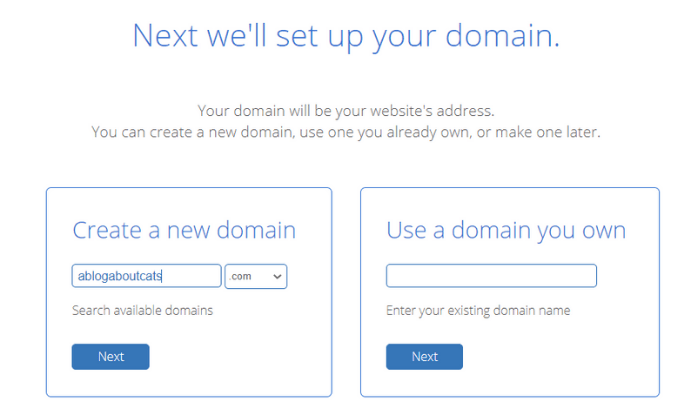
I would suggest that you opt for an .com extension since it appears more professional, and will aid in earning extra brownie points from your visitors’ eye.
Alternative Option:
If you have already an already registered domain through an outside domain registrar it is possible to continue using it instead of having to create a new domain.
Select the Choose a domain that you have option, then select the following. Follow the steps to move your domain the current location to Bluehost.
Enter Your Account Details and Finalize the Deal
Complete your personal details to establish the Bluehost account. Also, you’ll need to confirm the details of your plan as well as select the relevant additional services (these costs additional) before you can finalize the agreement.
When you’re at this point it’s time to pick the amount of time that you’d like to join to Bluehost. Although the minimum commitment is a single year I would recommend a three-year plan as it gives the most bang on your buck.
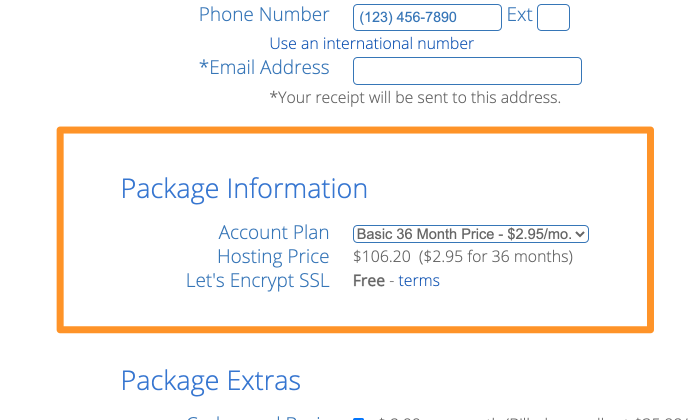
Three years might seem as a lengthy commitment given the exceptional support offered by Bluehost It’s an excellent bargain. Additionally, you’d like your online store to stay active enough for a long time to earn plenty of cash isn’t it?
In any case, Bluehost offers a 30-day refund guarantee. You can also receive a full refund should you are not satisfied.
All that’s left to pay for is the subscription fees. It’s possible to pay with a credit card or alternative ways to pay.
Now you’ve got an address for your domain and an hosting plan that goes along with it.
Step 2: Install WordPress on Bluehost
It’s the beginning of your journey using WordPress and how you can start installing WordPress onto your account with a hosting provider. Because it’s free, you won’t be required to pay for any setup charges.
Additionally, Bluehost will do the installation for you!
When you sign for an account with Bluehost You’ll be sent confirmation emails that contain the login details for you. You can use this to log into Bluehost after which the hosting company will help users through the steps to installation of WordPress.
There is also the option of going to your Bluehost account to set up WordPress. Select My Websites and then click creating a site. Installation will begin from the moment you click.
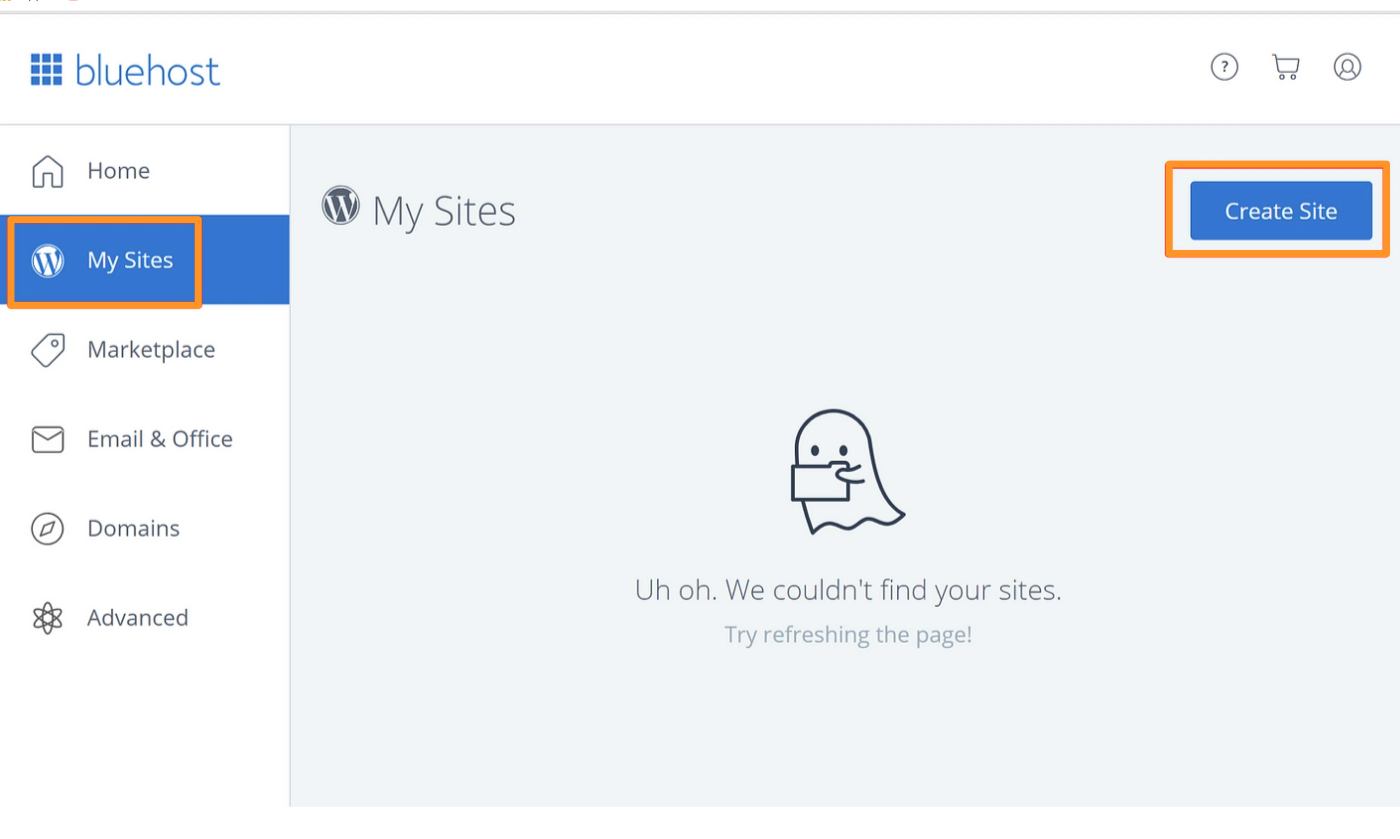
After the installation has been completed After installation is complete, enter the domain name for your site, followed by your username as well as the password.
With your blank WordPress website it’s moment to transform to a fully functioning E-commerce store.
Step 3: Select an Ecommerce Plugin
A major difference in one of the main differences between a WordPress eCommerce website as opposed to a regular WordPress website is that the latter allows you to sell items on the site directly.
As of now, there’s any built-in WordPress eCommerce features built-in You’ll need to install an e-commerce plugin in order to add this feature to your site.
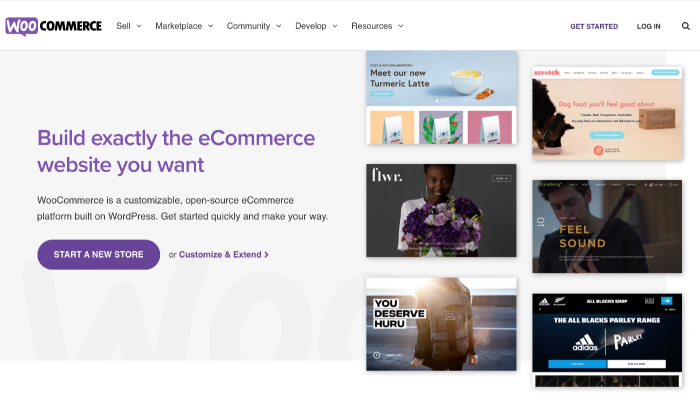
My top choice? WooCommerce.
This is how to install the WooCommerce plugin
#1 Go to your WordPress dashboard, then click Plugins and then adding a new.
#2 Enter ‘WooCommerce’ within the search bar in the upper-right edge of your screen.
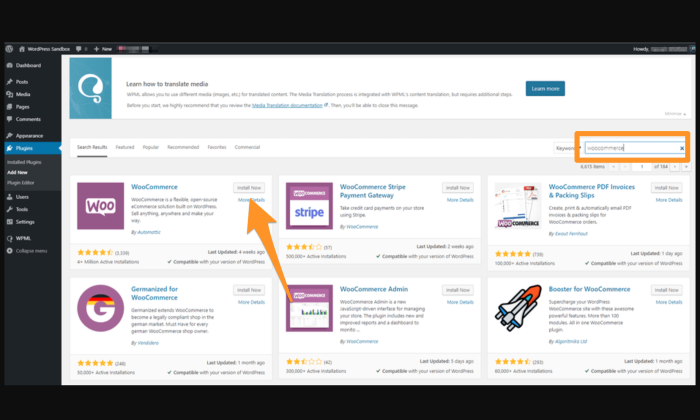
#3 Click the Install Now button that is in front of the plug-in. In a short time it will be blue, and read activate. Hit it.
Now, you’ll be able to see the WooCommerce setup wizard, which is displayed on screen. It will guide you through the setup procedure. Like you’d expect, this entire process is extremely easy to follow and only takes less than a minute.
Other Ecommerce Plugins Options:
As much as I love WooCommerce, it isn’t the only one option, there are additional plugins, too. Two other plugins you could look into:
WP eCommerce
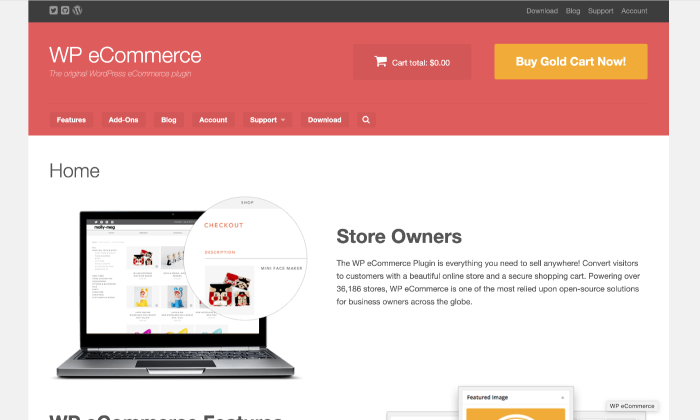
Although it isn’t as full-featured as WooCommerce is, many think of WooCommerce eCommerce as an excellent option for establishing an online store using WordPress. Its capabilities include shopping carts, checkout facilities as well as data-reporting capabilities as well as the management of inventory.
While WP eCommerce is a free service however, it is possible to purchase premium extensions that will enhance its capabilities. It is possible to purchase premium payment gateways, such as Stripe as well as Authorize.net.
Easy Digital Downloads
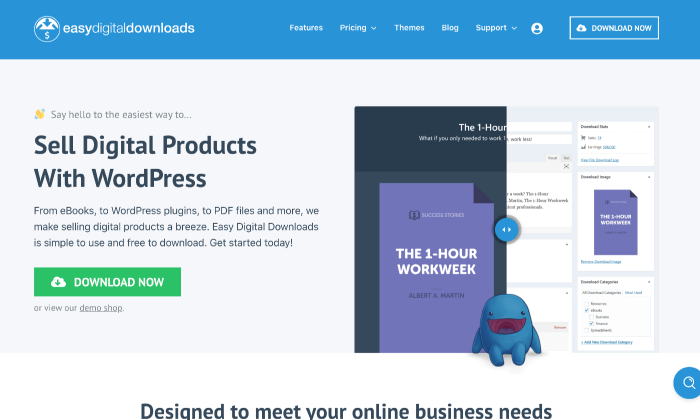
Easy Digital Downloads was specifically made to aid you in selling digital goods. It allows you to make discount coupons, take advantage of complete tracking and reports of sales, downloads and other data in addition to putting limitations on downloading.
In case you’re not planning on selling physical goods then this software could be the best option for your needs.
Additionally, you can add more functions to your online storefront by using extensions and payments such as PayPal. The plugin itself is completely free, and also offers extensions in the event that you wish to include more features to your shop.
Step 4: Setting Up WooCommerce
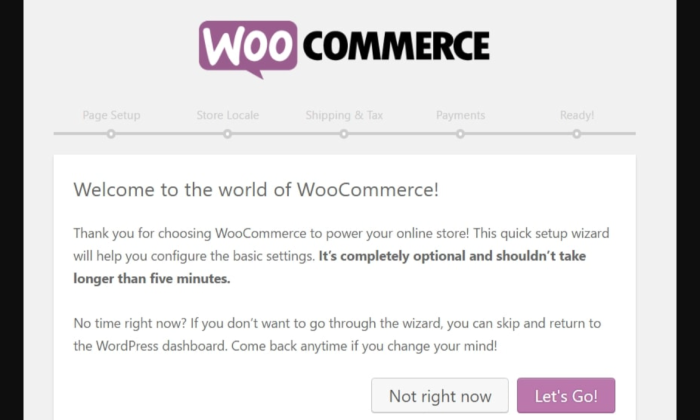
This stage has multiple requirements that include creating necessary page for stores, creating a location, understanding the implications of sales tax as well as deciding on the payment option.
Let’s look at them in greater details in the following paragraphs:
Creating Important Store Pages
The online stores you shop on can be extremely particular, and that’s why you will need special store pages to be functional. This is precisely why the initial process in WooCommerce Wizard WooCommerce Wizard is to create the appropriate pages.
- Your shop page will show everything you have purchased.
- Cart page is where customers can make changes to their order. cart Page is the place where customers are able to modify their order prior to completing their purchase.
- Checkout page checkout Page is where clients can select the delivery or shipping method, and complete the payment.
- My Account page My Account page functions as an account page for registered customers. It shows their history of orders, contacts, and additional information.
All you have to do is follow the steps then WooCommerce will create those pages for you.
Setting Up Your Locale
The location is a crucial aspect of the online store configuration. It tells you which part of the world the store’s location is. Online stores too must be set up with this info. Your location determines your country of birth the operating language you use, as well as your most frequently used currency as well as the units used to measure it.
Choose Continuewhen you are done configuring your locality.
Go through WooCommerce’s Sales Tax Module
In the majority of cases there will be sales tax. For this, it is necessary to look into the tax box on your primary account.
Be sure to read the entire module and know the tax rates for the location of your store.
Choose Continuewhen you are done.
Choose a Payment Method
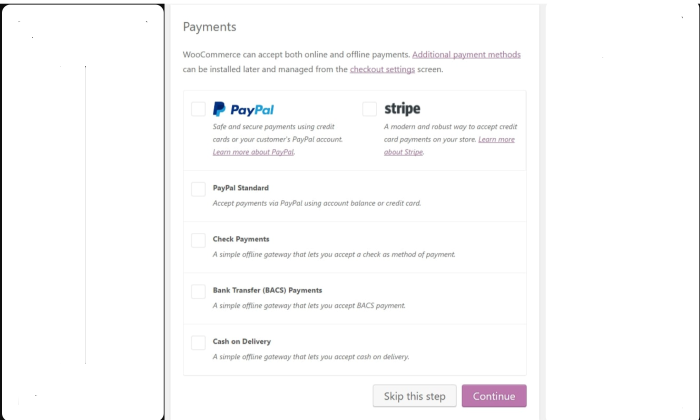
WooCommerce accepts online as well as offline transactions. Although PayPal is the preferred option but you are also able to choose among Stripe COD,, or banking transfer transactions, in addition to others.
Choose Continuewhen completed.
Step 5: Adding Your Products or Services for Sale
In order to launch your shop, you’ll need to have items, services, or downloads, whatever you offer in your database.
Log into your dashboard click on Products, then click Add Product. then click on the Add Product button..
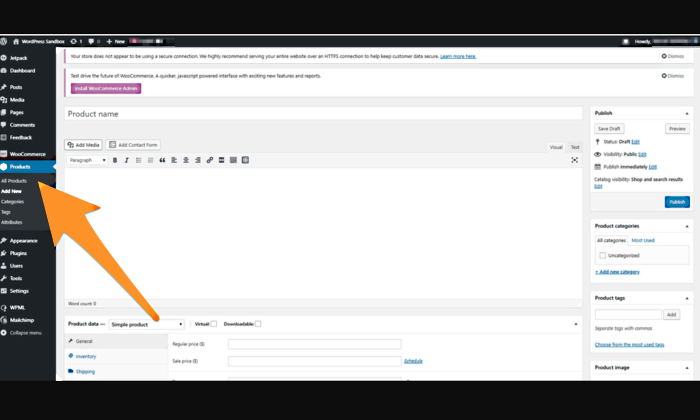
There’s a standard WordPress editor screen. It has fields for product names description, product details section, a descriptions of the product, product categories and tags, image of the product and gallery of products.
WooCommerce provides you with useful tips to clarify the goal of each field to help you understand what it is all about. Hit the publish button to upload your items.
When you’ve added your items into your database final outcome should look like the following:
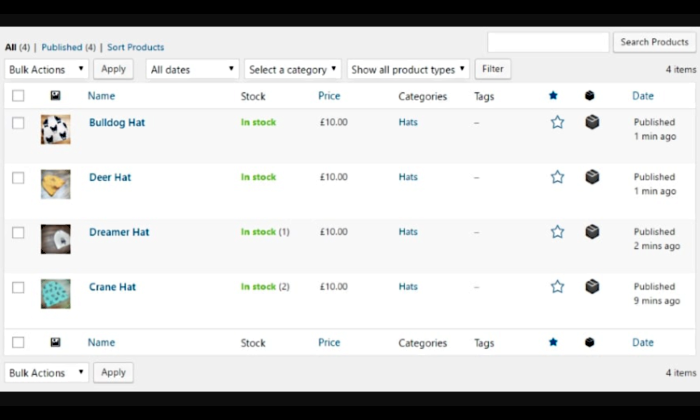
Voila! Now you’ve added your items (or what ever it is you are selling) on the WordPress website.
Step 6: Choose a Theme for Your WordPress Online Store
The theme of your website determines how the site’s content will appear to customers. What’s great about WordPress is that you are able to change and modify your theme anytime you like to create a distinctive design that will set your shop apart from rivals.
Be aware of this:The customization option is intended for coders who are a professional. If this isn’t your case then you should choose an already-designed theme that closely matches your ideal.
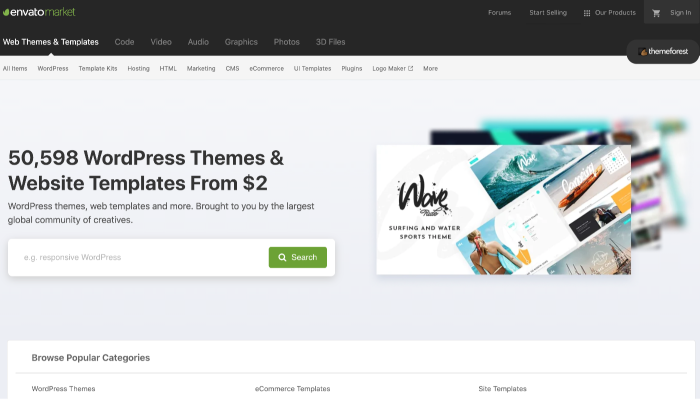
There is the website of a third party like ThemeForest to begin. There are millions different themes to choose from, meaning that you’ll never run out of choices.
Downloading a WordPress Theme using WordPress.org’s directory. Official WordPress.org Directory
#1 Visit your WordPress dashboard and select the Appearance tab and click on Themes..
2Click at the Add New button to navigate through the themes available. It is also possible to try a demo of a few themes to check what your store’s appearance similar to.
#3 Click the Install button to install the theme that you are interested in. In a short time it will say “Activate”. Choose it and you can choose the design.
Installing a Premium Theme
#1Download the .zip download of the theme.
2 Log into your WordPress dashboard. Go there to Appearance Then Themes..
#3 Click the Add New option. This will lead your onto the WordPress theme Dashboard.
#4Select the Upload Themeoption. Select the .zip file on your PC following the prompt.
There will be a link for you to activate your theme in the wake of an error message.
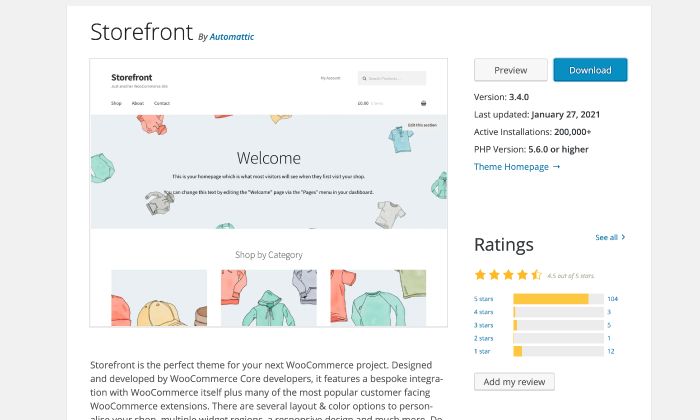
Tips for the Web: WooCommerce also has its own theme dubbed Storefront. The theme not only functions perfectly when paired with WooCommerce’s plugin (duh! ) however, it is pretty stylish. It’s easy to stick with this style if you don’t need to deal with any hassle.
Step 7: Extend WooCommerce’s Functionality
One of the most impressive aspects of eCommerce is the number of plugins and extensions available to enhance its functionality. Below is a listing of a handful of extensions you should consider adding to your website:
- Payment Gateways. These extensions permit you to take on more payment methods as well as PayPal.
- Shipping Extensions. These extensions can be beneficial if you wish to link your store using the shipping costs offered by companies like FedEx and UPS with no extra work.
- WooCommerce Subscription. The extensions let customers sign up to your products or services for a set cost.
- TaxJar. This extension places your sales tax automatically.
- Accounting Extensions. These extensions connect your store’s online presence with the accounting software that you choose.
- WooCommerce Bookings. This extension lets customers make appointments directly on your website.
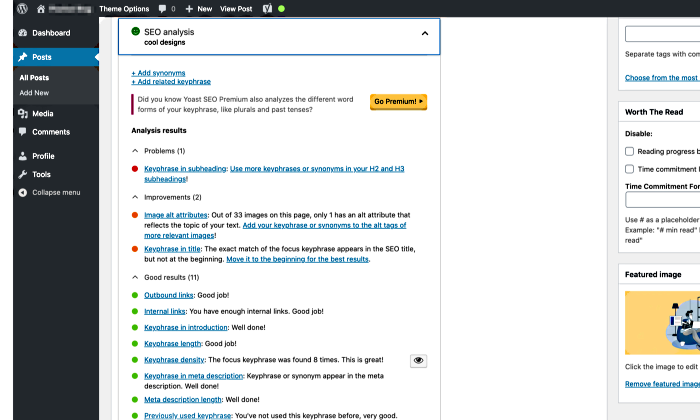
Furthermore there are various WordPress plugins such as Yoast SEO, UpdraftPlus, Contact Form 7, and MonsterInsights. Also, you can read my complete guide to the most effective WordPress plugins for more information and select the plugins that are most needed.
Conclusion
Congratulations! Now you have an e-commerce website using WordPress.
Perhaps you’ve realised that making your own e-commerce store using WordPress isn’t that difficult. All you require is the correct instructions. I’m hoping that my advice will aid you to start your own e-commerce business, and help you get your money coming into.
Make sure to keep updating your online shop by adding interesting information that can be converted. Make sure to improve the product description to make it rank better organically as well.
There is a lot to do that will end up being a long process. You must ensure that you’ve completed each step correct for the best results.
Are you on your way to begin your online shopping adventure already? Let me know more about your experiences.
Disclaimer : All images included in this article can be used to create common usage and the credit belongs to the creator of the photo